Showing posts with label street food. Show all posts

Friday, August 30, 2013

Homemade CocoHodo

So I’m writing this post as I sit on the plane to go on holidays. And mannnnn it is boring. So I decided that I’d just write up another blog post, even though this post won’t be going up for a couple of days.

I hope that you guys enjoyed the last post, Tom n Toms style honey bread, I’m really craving some at the moment……… too bad I’m on a plane and not actually going to a place that has Tom n Toms.

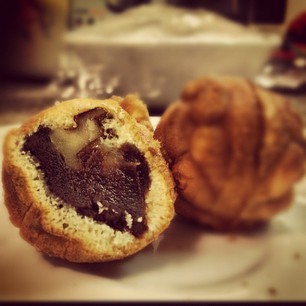
Anyways, today I’m going to be introducing you to another Korean snack food, and that is the coco hodo’s. These are little walnut pastries that are shaped like a walnut. These are particularly popular during winter when you can get them from street vendors. They are a particularly good in between meal snack to take on the go. They are quite inexpensive to buy, but it is always more fun to make your own.

To me I’d call them Korean profiteroles, although not really. It's made from a walnut pastry with a red bean filling and are AMAZING. The name is a bit deceiving when it is said in English, you sort of expect it to be made with chocolate coco = cocoa, but that might be just me.

-------------------------------------------------------------------------------
And that was all I got up to on the plane. I never actually managed to finish the post and here I am more than a month after returning finishing off the post. I'm so sorry for not posting much over the last 2 months, but I couldn't even access blogspot when I was on holidays and uni just got so overwhelming when I returned. I mean I've got exams in like 1 1/2 weeks and I and epically screwed.

Anyways, I hope that this recipe is going to satisfy your craving for new recipes and I'll try my best to put out recipes on a more regular basis. It should be quite easy once exams are over this semester. And I can't wait to share photos of the food that I ate whilst I was on holiday.

Anyways, back to today's recipe. Coco hodo. I'm pretty sure that I've covered all the introductory bases so let's move on to the recipe. I'm going to use a profiterole kinda pastry, so a choux pastry since I have no idea how to make the actual pastry, but I'll be adjusting it so it is similar in taste.

Ingredients
125 ml water
125 ml milk
100 grams butter
pinch of salt
100 grams flour
50g walnut flour (or almond meal) -- gives a nutty taste
4 eggs
1 cup red bean paste (store bought or home made)
2 tbs double cream
50g walnuts

Method
1. Heat the oven to 220ᴼC.
2. To make the pastry, melt the butter with water and milk in a large pan.
3. Bring to boiling point and tip in salt and flour. Using a wooden spoon beat hard for up to 30 seconds, till the dough no longer sticks to the sides of the pan.
4. Cool to room temperature (about 10 minutes).
5. While the dough is cooling, line 2 baking trays with baking paper.
6. When the dough has cooled beat the eggs, one at the time till the dough is smooth and glossy. Pour the dough into a pastry bag and pipe out profiteroles (about the size of a walnut) leaving enough space for them to rise, otherwise spoon with teaspoons. Tip your fingers in cold water and smooth the surface of profiteroles, as any spikes are likely to burn.
7. Bake the profiteroles in 220ᴼC for 10 minutes, then reduce to 190ᴼC and bake for another 15-20 minutes, until golden brown.
8. Using a knife poke a hole in each profiterole to let out the steam (and to fill later) and leave them to cool on a rack.
9. While the pastry is cooling prepare the red bean paste. You can adjust the sweetness of the paste to your liking and to make it extra smooth and creaming add 2 tbs of double cream.
10. Also cut the walnuts coarsely and mix it through the red bean mixture.
11. Fill a piping bag with the paste and get ready to pipe the pastry when it is sufficiently cool.
12. Fill the pastry with the hole that is at the base of the pastry.

And you are DONEEEEEEE.


This doesn't turn out to be a chewy as the original, but the pastry remains light and fluffy. It's not the easiest thing to make, but it is nice because it means you can still enjoy coco hodo even if you aren't near a store.

So I hope that you liked this recipe, and I'll try my best to post more often. Maybe in about 2 weeks time I'll have another post out. Until ten remember to stay safe, happy and healthy!!! 
Wednesday, February 27, 2013

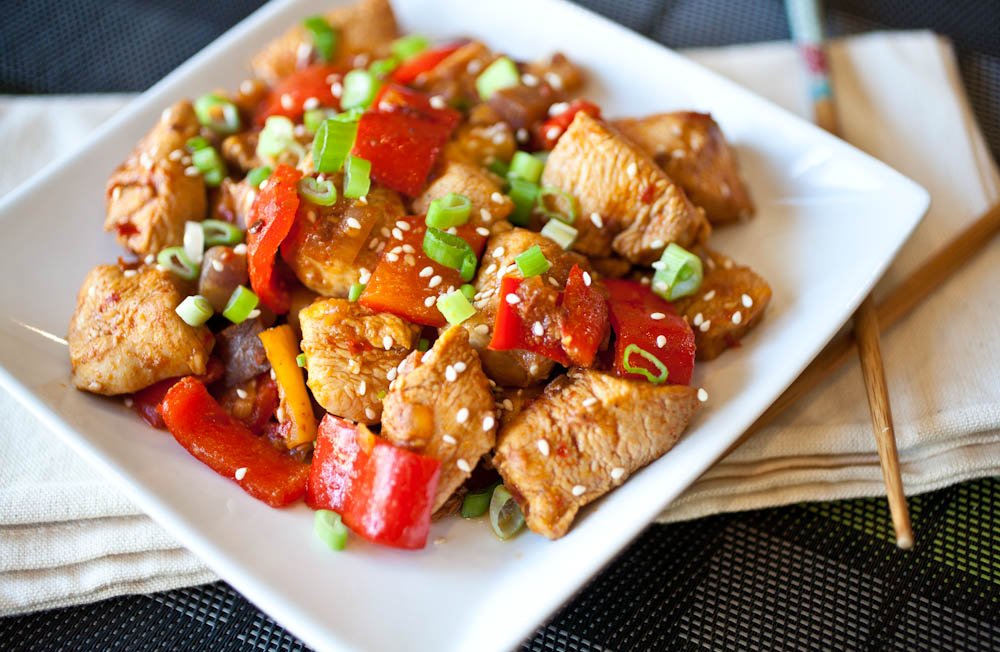
닭갈비 Dak Galbi

Hey guys, so it has been a while since I have lasted posted a recipe and I'm really sorry but things have been really hectic with uni about to start next week and me just freaking out about it in general. This may be the last post in a while, so regular posts may not occur until I have settles into uni, but I won't ever stop posting that's for sure.

Today I'm finally going to post up a recipe that is a very popular dish in Korea, and I can't believe that I have never posted about it before. As you can tell from the title the recipe is going to be of dak galbi (닭갈비)

It is said that dak galbi appeared after the late 1960s as an inexpensive anju (food that is eaten while drinking) in small taverns, on the outskirts of the cities to replace the comparatively expensive gui dishes which are grilled over charcoal. The dish has spread to the main districts of Chuncheon, where the livestock industry thrives and offers fresh ingredients with no need for refrigeration. There is a street known as dak galbi golmok (dak galbi alley) which has a high concentration of dak galbi restaurants

That's the history of the dish, I think that it is about time that I get on with the recipe:

Ingredients
6-8 chicken thigh
1 cup milk
1 tablespoon rice wine
salt and ground black pepper
1 tablespoon olive oil
1 heaping tablespoon gochujang
4 tablespoons gochugaru (chilli flakes)
6 tablespoons soy sauce
1 tablespoon oyster sauce
4 tablespoons sugar
2 tablespoons minced garlic
1 tablespoon sesame oil
4 tablespoons rice wine (sake) ground black pepper
2 cups broccoli, cut into bite sizes
1/2 onion, sliced
1 red bell pepper, seeded and sliced thin cooked rice

Method
1. Place thawed chicken thigh in bowl. Pour the milk over the chicken and set aside for 20 minutes. Drain milk.
2. Add 1 tablespoon rice wine evenly on the chicken. Season with salt and ground black pepper.
3. Heat oil in large pan. Add onions, broccoli and red bell pepper and stir well over high heat, about 3-5 minutes.
4. Add the chicken, brown chicken on both sides, but not cooked thoroughly at this point.
5. Make sauce by combining gochujang, gochugaru, soy sauce, oyster sauce, sugar, garlic, sesame oil, rice wine, and black pepper.
6. Add the sauce to the pan with chicken.
7. Cut the chicken into bite sizes using kitchen scissors, stirring occasionally. Continue to cook, stirring occasionally, until the chicken is cooked through.
8. Add cooked rice to the pan when you’re almost done with the chicken and stir together, if desired.

And there you have it, irresistible dak galbi to share with family and friends or to eat by yourself. The perfect balance of spice, sweet and everything nice.


I hope that you like that recipe, it is quite nice and you can always adjust the level of spice that you like. It may be a while before I post a blog post up again, but I will try to make time in my week (if not once a week then once a fortnight) So until next time I hope that you stay safe, happy and healthy. And to other people in the same shoes as me I wish you the best of luck!! 

Saturday, February 16, 2013

Korean Red Bean Doughnut 풀빵 Pul bbang

Hey guys, so today is the last day of my blog spectacular that involved desserts such as apple crumble and japgwapyon and Valentine's Day specials such as breakfast smoothies, a tandoori chicken salad entree, pesto chicken kiev main and a creme brulee panna cotta dessert. So please do check out those other posts from this week.

Today is the last day of my blog week, and I have enjoyed it like I always do. I really do need to blog more often, it is a nice was to de-stress and get creative but I have a slight issue with procrastination...ok it's a pretty big issue, but I'm working on it.

To top off the week I'm going to be introducing you to another Korean dessert, as I had promised yesterday. Pul bbang (풀빵) is a Korean pancake dumpling, usually stuffed with sweetened red bean paste (팥 앙금, patanggeum). You could call them Korean filled doughnuts.

The Japanese have their own version of pul-bbang, called takoyaki. It is stuffed with boiled, chopped octopus. Takoyaki batter also is savory and other than the shape I don't really see a resemblance between the two.

Pul-bbang is sold on the street in most major Korean cities. But they're more difficult to find than their more famous cousins, boong-uh-bbang (붕어빵),which are a red bean–stuffed bread shaped like a fish.

I think that is enough for the history of the bread, it is about time that I get started in the recipe.

Ingredients
1 cup rice flour
1/4 teaspoon salt
2 eggs, beaten
1 teaspoon baking powder
1 cup milk
1 cup sweetened red bean paste (the stuff from the can will do fine)

Method
1. Mix all the ingredients for the batter until smooth.
2. Set a round doughnut pan on medium heat. HINT: you can put your doughnut maker to use or you can use a small cupcake tin in the oven)
3. Place approximately 1 tablespoon of batter into each well of the pan. I used a two spoon technique to scrape and drop the red bean paste into the batter.
4. After you have filled all the wells with batter, immediately start placing the 1/2 teaspoon of the filling e in the middle.
5. Add another tablespoon or so of batter to the top to cover the filling.
6. Let the dumplings cook for a couple of minutes.
7. Turn each dumpling over after you notice bubbles in the batter and slight pulling away on the edges.
8. Cook for a few minutes more on the other side. From there, you can flip them alternating until they are golden brown on both sides.

And there you have it, a delectable Korean dessert that is sure to please all ages, from young kinds to the oldies.


I hope that you all found that as a fitting way to end the blogging week. I will be back soon with more recipes, Korean to clarify for those of you wanting more Korean recipes. 

I hope that you all enjoy your weekend and until next time remember to stay safe, healthy and most important of all happy. 

Tuesday, January 15, 2013

Twigim Gimbap

It has seriously been a really long time since I have last posted on here, and even without posting for a while I have still managed to rise with my blog views and I am extremely thankful for all the views. I'll continue to work hard in 2013 to ensure that you too get to cook awesome food.

And with that today I'm going to be posting a simple recipe, honestly it is not difficult at all and I have no idea whether or not it has been covered by another blogger.

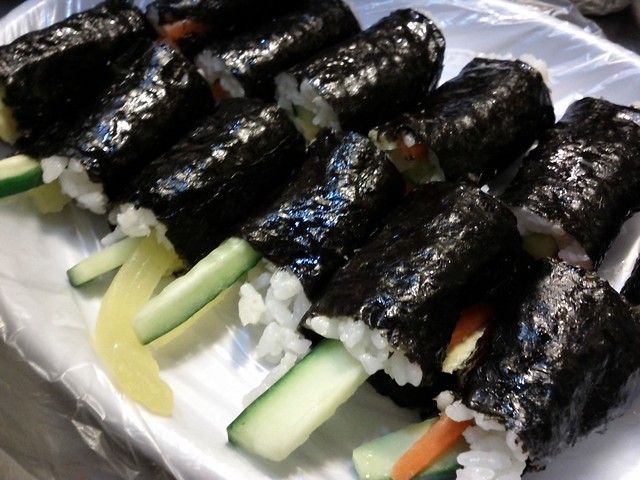
Anyways here goes, I'm pretty sure that this is something that is commonly found in street food stalls in korea and it is an awesome snack: twigim gimbap. It is basically just mini rolls of gimbap that has been dipped in batter and then deep fried so that it has a nice and crispy edge.

I'm going to show you how to make mini gimbap rolls today, and I will also link you to my recipe for full sized gimbap. The full sized gimbap can be cut into smaller pieces before being deep fried.

Ingredients
Kim (dried laver) cut in half
Pickled radish cut into small strips
Carrot julienned
2 eggs
2 cups of cooked rice
Optional:
Meat of some kind
Batter:
⅔ Cup Frying Mix (Batter)
½ Cup Water
¼ Cup Frying Mix (Coating)
3 Tbsp Potato Starch (or Cornstarch)
Salt

Method
1. Saute the carrots in a pan with sesame oil, salt and pepper until it is soft.
2. Beat the eggs and fry them in a pan to form a thin omelette. When cooked flip it out and then cut into thin strips similar to the size of the radish.
3. Cut both the egg and radish so that it will fit with the half sized laver.
4. Spread a bit of cooked rice on one sheet of the laver (half sized).
5. Put a bit of all the ingredients along the centre of the rice and then roll the laver to form a roll.

And there you go, mini rolls of gimbap.

However if you also want to have even smaller rolls of gimbap you can just use one filling and then roll the laver so that you form a cigar.

Or you can make normal sized gimbap and then cut it into pieces. The recipe is HERE.

To FRY:
1. Combine frying mix, cold (or ice) water, potato starch, and salt, and COLD water is the secret to getting crispy food.
2. When the gimbap is ready you can coat the gimbap in some frying mix first to help the batter adhere.
3. Dip the gimbap into the batter.
4. Make sure the oil is hot enough for frying and then deep fry the battered gimbap until it is golden brown, there is no need to wait too long because the gimbap is already cooked and you just want there to be a nice coating of crispy batter.
5. And there you have it, twigim gimbap.


I hope that you all enjoy this recipe and I will post something soon.

Until next time remember to stay happy, safe and healthy!!!!

Wednesday, November 21, 2012

Spicy Chicken Skewers 닭꼬치 Dakkochi

Hi there. I'm back with another blog post because it seems that I just have a lot of time these days. Not much has been happening in my life really, but I do start my job in about 2 weeks so there may be a slow down of posts depending on when I have to work. Or there may be no change. We shall see what happens.

I've decided to come back with a Korean favourite today. You can make it at home or you can buy it from street vendors, it is a popular dish with all ages because it encapsulates the Korean cravings for spicy food. It will be a nice inclusion in your meals as the days are getting colder in the Northern hemisphere and where I am it still doesn't feel like summer yet.

The dish that I am talking about is dakkochi or 닭꼬치 which is spicy chicken skewers. Pieces of chicken are brushed with a slightly sweet red sauce while being grilled over an open flame. The result is a tender, juicy treat bursting with flavor. And is is so simple that you will be able to replicate it at home. You may not be able to exactly replicate the smoky flavour of the skewers found in street vendors at home, but the taste will still be delicious regardless.

And now to get on with the recipe:

Ingredients
500g chicken, preferably from the drumstick
1 tablespoon minced garlic
pepper
salt
3 tablespoon milk
Marinade
1 tablespoon tomato ketchup
3 tablespoon water
3 tablespoon chilli flakes (you can adjust this)
2 tablespoon gochujang (you can adjust this)
2 tablespoon soy sauce
2 tablespoon brown sugar
1 tablespoon sesame seeds
1 tablespoon parsley

Method
1. De-bone and remove the skin of the chicken and chop it into bite-size pieces or the size you want for your skewers.
2. Marinade the chicken in the salt, pepper, garlic and milk.
3. To make the spicy marinade mix all of the marinade ingredients together in a bowl.
4. When ready to cook, make the chicken skewers. You can decide how many you want.
5. Preheat an oven to 180 degrees Celsius and then add the skewers.
6. Coat each skewer in the marinade just before you put it in the oven.
7. Continue to brush marinade onto the skewers in 5 minute intervals as they cook in the oven.
8. Bake for about 20 minutes or until cooked whist rotating the skewers.
9. Take it out and garnish if you wish.

And there you have it, simple make at home dakkochi.


This will be it from me today, I hope that you guys will enjoy the recipe. Remember to stay safe, happy and most important of all healthy until I blog again. 


Thursday, November 15, 2012

Bbopki 뽑기

Hey guys, I seem to be taking more than a week to upload a new blog post these days. I'm really sorry but the time kinda just blurs now because I no longer have to go to school or do anything really. But I am back with a new post today ^^

I think I will be posting about a sweet recipe today. It isn't really a dessert but more of a snack.... You may have seen it before if you have watched Family Outing (I know it is super old, but it is so nice)

It is a traditional Korean candy made of carmelised sugar and a pinch of baking soda, bbopki (뽑기) is usually formed into round disks or molded onto a stick as a lollipop. You can find it at food stalls on streets, but honestly it is so simple there is no need for it.


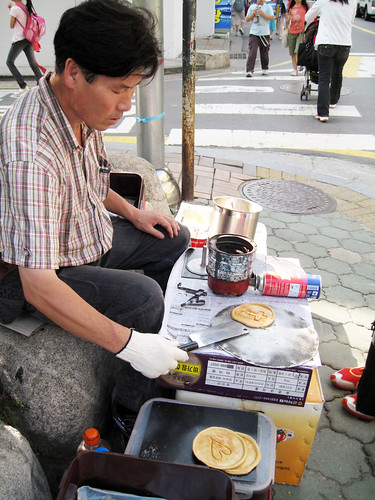
Usually you will just see the vendor making bbopki sitting over a hot plate on a table. Many bbopki vendors stamp the candy with a design or shape, and if you manage to eat around the shape without breaking it, then you can get another bbopki for free (you can watch the EatYourKimchi video with bbopki in it too) The candy tastes like a slightly burnt campfire marshmallow, and it's very sweet.

It is a super simple recipe so I will probably post something tomorrow as well. But here we go -->:

Ingredients
Sugar
Baking soda

Utensils
Foil
Metallic scoop (it will get burnt so set one aside for this)

Method
1) Add a desired amount of sugar to scooping thing. Just don't have so much that when you stir the sugar it over flows. I usually go for 2 table spoons.
2) Place the foil sheet on a table.
3) Turn on your stove.
4) Place the scoop above the flame to let the sugar heat up.
5) Stir the sugar with a wooden chopstick as the sugar begins the melt turning into caramel.
6) When the sugar has completely melted into pure liquid (but is not burn) get a pinch of baking soda and add it to the sugar liquid.
7) Place the scoop back on to the fire and stir the liquid.
8) Stir as you see that the liquid starts to become the color of a caramel.
9) Take the scoop off of flame and quickly pour the substance on the foil.
10) You can now make it into a lollipop or a flat piece of candy.
11) To make a lollipop you can place a paddlepop stick inside the bbopki
12) To make flat bbopki place another piece of foil above the bbopki and flatten it (but not too flat,let it be about 3mm)
13) Wait until bbopki is hard enough to remove from foil

And there you have it, a sugar dessert that is just glorified caramel.


I hope that this will be a fun yet quick recipe that you will want to try out. It is one of the most simple snacks ever, but I guess there will always be the risk of burning your caramel, but remember that practice makes perfect.

That is it from me today, but like I said above I will try and post another recipe post tomorrow because this one was so simple. Until then remember to stay happy, healthy and safe.

Sunday, September 18, 2011

Mandu 만두

Kekeke, as I said yesterday here is another blog post today. I'm relishing the amount of free time I have at the moment after exams. Anyways...I've been thinking about what to blog about today and I figured that it was about time that I had introduced a staple in Korean Cuisine. Mandus (만두) , if you like or enjoy Chinese food then you are likely to have encountered the Chinese equivalent of this before, dumplings.

Now for a bit of a history lesson: Mandu (만두) are believed to have been first brought to Korea by Mongolians in the 14th century during the Goryeo Dynasty. The state religion of Goryeo was Buddhism, which discouraged consumption of meat. Mongolian invasion of Goryeo relaxed the religious prohibition against consuming meat, and mandu was among the newly imported Mongolian dishes that included meat.

Another possibility is that mandu (만두) came to Korea at a much earlier period from the Middle East through the Silk Road. Historians point out many cuisines based on wheat, such as dumplings and noodles originated from Mesopotamia and gradually spread from there. It also spread east along the Silk Road, leaving many versions of mandu throughout Central and East Asia.

But it doesn't really matter how you look at the history, all you need to know is that these things are delicious. They can be eaten a number of different ways, they can be boiled, steamed or fried. They are really versatile and the fillings are up to you, there are probably 100 different ways to eat them. This is also a popular street food that is eaten by Koreans in winter.

I'm going to show you how to make a simple mandu with a pork and beef filling. The recipe is a bit long and it is split into parts, but I'm going to tell you a short cut at the end of it. OK? Let's go

Ingredients:

1 cup of ground pork
2 cups of ground beef
2 cups of chopped boo chu (Asian chives)
4-5 soaked Shiitake mushrooms
half onion
half package of tofu
3 cloves of minced garlic
salt
sugar
sesame oil
vegetable oil
fish sauce
egg
green onion
mandu skins (60 discs) <-- dumpling skins from the Asian grocer will go

Make filling:

1. Place 1 cup of ground pork and 2 cups of ground beef into a big bowl.
2. Add 1 ts of salt, 1 tbs of sesame oil, ½ ts of ground pepper and mix it by hand and push the mixture of meat on the side of the bowl.
3. Wash asian chives (bu chu), dry well with paper towel or cotton cloth and then chop them to make 2 cups. Add 1 tbs of oil and mix it up. Place it in the big bowl next to the ground meat.
tip: oil will coat vegetables so that liquid would not come out from it
4. Chop 4-5 soaked shiitake mushrooms and half an onion and put it into a small bowl.
5. Add 1 ts of soy sauce, 1 ts of sugar, and 2 ts of sesame oil the small bowl in the last step. Mix it by hand and then transfer it to the big bowl.
6. Squeeze half a package of tofu using cotton cloth or paper towel and put it into a small bowl. Then add a pinch of salt, 1 ts of sesame oil and mix it and put it next to chopped chives.
7. In the big bowl, add 3 cloves of minced garlic and mix all ingredients by hand.


Make Mandu:

1. Place one mandu skin on your left hand and put some filling mixture on the center of the skin.
2. On the half of the edge of the skin, put a little cold water with your fingertips.
3. Fold skin in half over filling and press edges together to make ripple shape.


To Fry
1. Place some vegetable oil on heated pan and add mandu.
2. Lower the heat over low medium and cover the lid of the pan to cook.
3. A few minutes later, open the lid and turn over each mandu. Place 2-3 tbs of water and cover the lid. Cook a few minutes more over low heat.
4. When the mandu is golden brown, transfer it to a plate.
5. Serve hot with dipping sauce (equal parts vinegar and soy sauce).


To Steam
1. Place the mandu in the freezer to harden for an hour or so.
2. Just place a steamer or metal colander over a boiling pot of water.
3. When water starts to boil, place frozen mandu like so. Don't overlap them. They'll stick to each other.
4. Cook about 5-8minutes or until the wrapper has turned a more transparent colour. Tip: If you are unsure you can check the inside and see if the meat is cooked.
5. Serve with soy sauce.


To Boil
1. Bring to the boil a pot of water, enough for the number of mandus you are cooking
2. Carefully place the mandu's in so that you do not scold yourself
3. Cook till the mandu's rise to the surface of the water.
4. Scoop out and serve with soy sauce.


And there you have it, three different ways to eat the same thing. As I had said before to make the dish is actually a bit tedious and long. The cheats way is that you can always go and but frozen mandu from the grocer and just cook them yourself, but isn't it nicer too eat food that you have made by hand?

Anyways, maybe spend this week making a supply of mandu and I'll be back with another recipe next week ^^

Sunday, July 24, 2011

Hotteok 호떡

So I'm suddenly craving hotteok 호떡. You may not know what it is....well it is a popular street food in Korea and is usually eaten in Winter. Which is perfect for now because it is cold.

The dough for hotteok 호떡 is made from wheat flour, water, milk, sugar, and yeast. The dough is allowed to rise for several hours. Handful-sized balls of this stiff dough are filled with a sweet mixture, which may contain brown sugar, honey, chopped peanuts, and cinnamon. The filled dough is then placed on a greased griddle, and pressed flat into a large circle with a special tool with a stainless steel circle and wooden handle as it cooks.

It is sort of like a pancake with fillings...if you want to put it that way. It is apparently best not to indulge in this snack because of its high sugar content...but I have a sweet tooth so it is sort of inevitable that it will happen.

My fingers are getting colder and colder, so I'll move on to giving you guys the recipe for this snack.

Ingredients
2 3/4 – 3 cups all purpose flour
1 tsp baking soda
3/4 tsp salt
1 tbsp sugar
1 cup milk (low fat or full)
Filling
1/4 cup brown sugar
2 tbsp sugar
3/4 tsp ground cinnamon

Method
1. In a large mixing bowl, whisk together 2 1/2 cups flour, baking soda, salt and sugar. Stir in milk and mix until smooth. Gradually add in the remaining flour until dough is very stiff.
2. Turn the dough out onto a floured surface and gently knead until dough is just barely tacky to the touch, and feels fairly smooth and elastic (about 1 minute).
3. Shape dough into a ball, cover it with a clean dish towel and let rest for 15 minutes.
4. In the meantime, combine all filling ingredients in a small bowl and set aside.
5. Once rested, divide the dough into 6 equal pieces.
6. Work with one piece of dough at a time. Roll it out on a lightly floured surface into a circle about 5-6-in. wide. Place 1 tbsp filling in the center of the dough, then bring up the sides and pinch them together around the filling to seal tightly.
7. Roll out the dough ball with filling inside, lightly flouring both the surface and the rolling pin to ensure that nothing sticks and tears open the dough, until you have a disc about 1/4-inch thick. Slightly thicker is ok, but the cake should be quite thin. Repeat with all remaining pieces of dough.
8. Put about 2 tbsp of vegetable oil in a large pan and turn up the heat to medium-high. When oil is hot, place 1 or 2 of the hotteoks (depending on the size of your pan) in the pan and cook until golden brown. Turn once, then cook the second side until it is golden brown as well, about 3-5 minutes overall.
9. Repeat with remaining hotteoks.
Serve hot.


I hope you guys enjoy that snack. And I'll be back with another recipe next week. I promise to make it Korean (: