Showing posts with label fried. Show all posts

Tuesday, October 1, 2013

Mozzarella Cheese Sticks

Hey there, I think we've had quite a few nice drinks so far so today I've decided to come up with some food food. Something that is a starter, but actual food that you can chew on. It is one of my favourite things ever, cheese sticks.

I know that not everyone is a fan of cheese, and I don't understand at all - how can you not like cheese? But anyways, these are really nice and you can always trick your non-cheese eating friends that it is fish fingers and wait for the reaction because it is HILARIOUS.

There isn't much to say about this dish other than that it is delectable, crispy on the outside and molten cheese on the inside. Feel free to choose whatever cheese you want inside, but it does work best with a soft cheese that oozes as you bite into it. I like to use mozzarella because it is my favourite, but you can use Brie or Camembert or even cheddar if you would like to.

I have nothing else to say so let's get this recipe started!

Ingredients
200g mozzarella cheese
100g flour
50g corn flour
1 large egg beaten
100g bread crumbs
oil to fry in
1/4 cup mayonnaise
1 tsp Dijon mustard
1/4 cup finely chopped herbs (parsley, tarragon or chives)
1/2 tsp garlic powder

Method
1. Preheat oil to 180C
2. Combine the flour and corn flour. Season flour with salt and pepper.
3. Cut mozzarella into 16 sticks, making sure cheese is cold
4. Dip cheese into flour, then egg, into flour again, egg again and finally breadcrumbs (this will seal everything in)
5. Lower cheese sticks into flour and fry for a few minutes until the outside is golden. Drain on paper towels a bit.
6. While cheese sticks are cooking combine mayonnaise, Dijon mustard, garlic powder and herbs in a bowl and mix.

And there you have it. The perfect finger food for a party, or even a snack for yourself on a lonely movie night in. 


I hope that you guys like today's post. I can't believe I'm already on day 4 eeeeek. Anyways stay tuned for more tomorrow :D

Tuesday, January 15, 2013

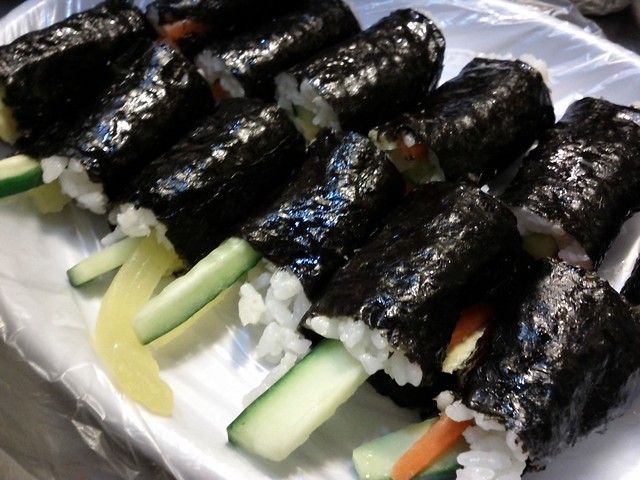
Twigim Gimbap

It has seriously been a really long time since I have last posted on here, and even without posting for a while I have still managed to rise with my blog views and I am extremely thankful for all the views. I'll continue to work hard in 2013 to ensure that you too get to cook awesome food.

And with that today I'm going to be posting a simple recipe, honestly it is not difficult at all and I have no idea whether or not it has been covered by another blogger.

Anyways here goes, I'm pretty sure that this is something that is commonly found in street food stalls in korea and it is an awesome snack: twigim gimbap. It is basically just mini rolls of gimbap that has been dipped in batter and then deep fried so that it has a nice and crispy edge.

I'm going to show you how to make mini gimbap rolls today, and I will also link you to my recipe for full sized gimbap. The full sized gimbap can be cut into smaller pieces before being deep fried.

Ingredients
Kim (dried laver) cut in half
Pickled radish cut into small strips
Carrot julienned
2 eggs
2 cups of cooked rice
Optional:
Meat of some kind
Batter:
⅔ Cup Frying Mix (Batter)
½ Cup Water
¼ Cup Frying Mix (Coating)
3 Tbsp Potato Starch (or Cornstarch)
Salt

Method
1. Saute the carrots in a pan with sesame oil, salt and pepper until it is soft.
2. Beat the eggs and fry them in a pan to form a thin omelette. When cooked flip it out and then cut into thin strips similar to the size of the radish.
3. Cut both the egg and radish so that it will fit with the half sized laver.
4. Spread a bit of cooked rice on one sheet of the laver (half sized).
5. Put a bit of all the ingredients along the centre of the rice and then roll the laver to form a roll.

And there you go, mini rolls of gimbap.

However if you also want to have even smaller rolls of gimbap you can just use one filling and then roll the laver so that you form a cigar.

Or you can make normal sized gimbap and then cut it into pieces. The recipe is HERE.

To FRY:
1. Combine frying mix, cold (or ice) water, potato starch, and salt, and COLD water is the secret to getting crispy food.
2. When the gimbap is ready you can coat the gimbap in some frying mix first to help the batter adhere.
3. Dip the gimbap into the batter.
4. Make sure the oil is hot enough for frying and then deep fry the battered gimbap until it is golden brown, there is no need to wait too long because the gimbap is already cooked and you just want there to be a nice coating of crispy batter.
5. And there you have it, twigim gimbap.


I hope that you all enjoy this recipe and I will post something soon.

Until next time remember to stay happy, safe and healthy!!!!

Friday, October 26, 2012

Sweet Potato Twigim 고구마 튀김 Goguma Twigim

Hey guys, so it has been a really LONG time since I last posted up a recipe. But I have been having my MAJOR exams, and my last exams ever for high school for the past couple of weeks so I've been studying  I'm currently on a one week break from exams so I though that I might post up a couple of recipes this week. Maybe two or three.

I thought that I would keep it simple since it is my first post in a a while.

Sweet potato twigim or 고구마 튀김 (Goguma Twigim) is fried sweet potato pieces. Very much the sweet potato version of chips or fries.

Twigim is just batter-dipped items that include various vegetables, meat, seafood and kimbap - just about anything that with have batter stick to. It is the same concept as tempura, expect Korean.

The recipe is extremely easy to follow and in the end you get fluffy sweet potato encased in a crisp batter. Here is the recipe:

Ingredients 
1 lb Korean Sweet Potato
⅔ Cup Frying Mix (Batter)
½ Cup Water
¼ Cup Frying Mix (Coating)
3 Tbsp Potato Starch (or Cornstarch)
1 tsp Sugar (Optional)
⅛ Generous tsp Salt 

Method
1. Wash the sweet potato and remove any bad parts on the skin. Cut it into ¼-inch slices. You will get about 25 pieces. Korean sweet potatoes have a different taste and texture than American sweet potatoes. They are sweeter and have a firm texture. So please use Korean sweet potatoes for this recipe.
 2. Sprinkle salt evenly on top of the sweet potato slices. Set them aside what you are preparing the batter. This will help boost the sweetness of sweet potato later. Preheat your oil on medium-high.
3. Combine frying mix, cold (or ice) water, potato starch, and sugar. Mix everything together. Cold water is one of the secrets for getting crispy food. You can skip the sugar if you want.
4. Put frying mix in a plastic bag and add the sweet potatoes. Shake the bag to coat the sweet potatoes with the frying mix. This will help the batter stick to the sweet potatoes better.
5. Dip the floured sweet potatoes into the batter. Cover both side of the sweet potatoes with the batter.
6. Drop a little bit of batter into the heated oil to check if the oil is hot enough. When the batter floats right away, the oil is ready. Put the battered sweet potatoes into the hot oil. Deep-fry them on medium or medium-high, depending on your stove’s power.
7. Fry them for 5-6 minutes, or until the sweet potato slices are completely cooked, and the outside is golden brown. The easy way to check if a slice is cooked is to poke the center of it with a folk or chopstick. If your chopstick go through smoothly, it is done.
8. Place some paper towels on a tray and put the fried sweet potato slices there to cool and loose some of the grease.


And there you have it, super simple sweet potato twigim that will be ready in minutes. The fluffy centre and crisp coating is perfect to eat right now in the Autumn and Spring weather.

I hope that you guys liked that recipe, and I will try to post again on the weekend. Until then please stay healthy, safe and happy!!

Sunday, September 16, 2012

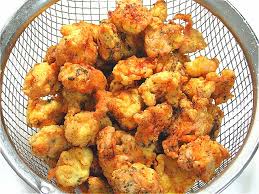
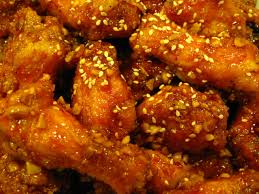
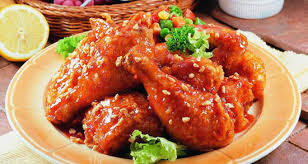
Korean Fried Chicken 양념 통닭 Yangnyeom tongdak

So, like I promised yesterday here is another recipe today. Yesterday we had pork, so today I will be introducing you to a dish with chicken. You all know the standard friend chicken we get in Western countries right? Well the answer is KFC. Well today I will be posting about Korean Fried chicken.

Yangnyeom tongdak (양념 통닭)is a popular dish especially around the time of sporting tournaments, much like KFC. But this chicken is flavoured to suit Korean tastes by being slightly spicy. Today I will be showing you how to have it plain or seasoned, but both as still delicious. The chicken in this recipe is nicely battered and fried with a slightly sweet and spicy sauce. And now to the recipe:

Ingredients
Main Ingredients
1 kg Chicken (About ½ Chicken)
⅛ Cup Milk
¼ tsp Salt
⅛ tsp Black Pepper
1 Pinch Ginger Powder (Optional)
Batter Ingredients
¼ Cup Potato Starch or Cornstarch
¼ Cup Frying Mix or Flour
½ Tbsp Korean Curry Powder
2 Pinches Salt
2 Pinches Black Pepper
Sauce Ingredients
¼ Cup Ketchup
3 Tbsp Red Pepper Paste
2 Tbsp Corn Syrup
1 Tbsp Sugar
1 Tbsp Minced Onion
½ Tbsp Soy Sauce
½ Tbsp Minced Garlic
½ Tbsp Cooking Oil
1 Tbsp Sesame Seeds

Method
1. Combine chicken, milk, salt, black pepper and ginger powder in a bowl. Marinate it for about 10 minutes. This step (especially the milk) helps to reduce some of the bad chicken flavor.
2. If you don’t want to use milk to get rid of bad chicken flavor, here is another way to marinate the chicken; mix the chicken with 1 tsp of minced garlic, ¼ tsp of salt, ⅛ tsp of black pepper, and 1 pinch of ginger powder (optional). Add 2 Tbsp of water or cooking wine for some moisture.
3. To coat the chicken, mix the batter ingredients in a large bag. Shake the bag to mix everything together.
4. Add all of the marinated chicken to the flour mix and shake the bag: so the chicken will be evenly covered with the powder.
5. Take out the chicken from the bag and set the pieces aside while the oil is heating. You will have some leftover flour mixture in the bag; save it for later.
6. Pour the cooking oil in a deep frying pan and heat it on high.
7. By the time, the oil becomes hot, the flour coating of the chicken will be soggy. Coat each piece of chicken again with the remaining flour mixture right before frying.
8. Drop a little piece of the flour mixture to the heated oil, if it floats immediately, the oil is hot enough to fry the chicken. Carefully put the chicken into the oil.
9. Fry the chicken on high for several minutes (8 to 10 minutes) until the pieces become light brown. We will fry them twice, so you don’t have to fry them too long in this step. Take out the chicken, drain the oil, and set the pieces on a kitchen towel.
10. For the second frying, fry the chicken in hot oil again for several minutes (5 minutes) until they become golden brown. This time, make sure that the chicken is completely cooked. You can take out one piece and cut it in half with a knife to check if it is cooked.
11. Meanwhile, add all of the sauce ingredients together in a pan, except for the sesame seeds and cook it on medium.
12. Once the sauce starts to bubble, cook it for one more minute. The sauce amount is enough for only half of the chicken, so mix in half of the fried chicken into the sauce. Turn off the heat and cover the chicken with the sauce. If you want to season all of the chicken, double the sauce recipe.
13. Lastly, sprinkle 1 Tbsp of sesame seeds on top and mix.

And there you have it a recipe for seasoned and not seasoned Korean fried chicken that is delicious however you decide to eat it.


I hope that you will enjoy that dish because it is pretty much fusion food. The Korean take on Western food.

I can't promise when the next time I blog will be because I have got major exams in a month and they go for about a month. The next two months may be a bit quite, but I will try my best to keep on posting when I find the time.

So until next time, be happy, safe and healthy everyone!!!!