Showing posts with label not korean. Show all posts

Sunday, May 5, 2013

Cookbook and Apple and Rhubarb Cake

Hey everyone, it has been so long since I've last posted a recipe and I'm really sorry about that but I've had exams. The exams are now over so I'll be posting a recipe tonight. But before I do that I have some very big news to share with you all.

I actually submitted one of the recipes on this blog for a cookbook competition at my university and it happened to get accepted. So it seems that one of my recipes is now going to be published into a cookbook. For those of you that are wondering the recipe was the one for the Gyeran Bbang, it's simple, cheap, delicious and perfect for a student like me. There was a photo shoot and all that jazz, and they are even going to film the recipe so you can also watch a video of it. There is going to be a book launch and everything, so I'm super proud about this and I'm so happy to finally be able to share it with all of you! If you haven't seen that recipe before do have a look at it, it's super scrumptious.

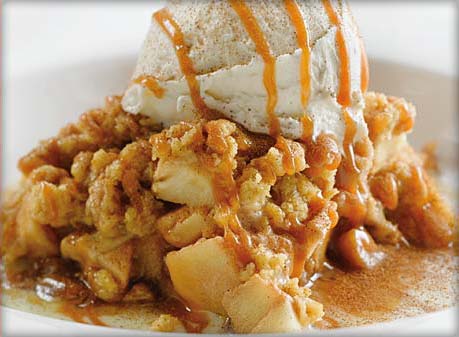
Now to move on to the blog for today. today's post is going to be a simple feel good dessert. It is starting to get cold here, as we start May so I thought what's better than a good old apple and rhubarb crumble. Only today I'm going to change it up a bit and convert it to a cake.

Apple and rhubarb cakes are wholesome and warm and are the perfect thing to keep you going on a cold night, or even as the spring approaches because that's technically the rhubarb season. A bit of custard or ice-cream on the side and you have the perfect dessert.

Ingredients
60 g soft unsalted butter
380g brown sugar
2 eggs
1 tsp vanilla extract
300g plain flour
1 tsp sodium bicarbonate
2 tsp ground cinnamon
1/2 tsp ground nutmeg
1/2 tsp ground allspice
1 cup sour cream
grated rind of 1 lemon
250g chopped rhubarb
250g chopped apples
80g brown sugar, extra
1tsp ground cinnamon, extra
Custard or ice-cream to serve

Method
1. Mix butter and sugar in processor until blended.
2. Add one egg at a time, mixing well between additions.
3. Add vanilla extract and mix well. Sift flour, spices and sodium bicarbonate together.
4. Fold into egg mixture alternatively with combined sour cream and lemon rind.
5. Fold rhubarb and apple in using a wooden spoon.
6. Spoon mixture into a 23cm spring form pan lined with baking paper on bottom and sides.
7. Combine extra brown sugar and cinnamon and sprinkle over cake.
8. Bake at 175C for about 1 hour and 50 minutes, or until cooked when tested with a skewer.
9. Cool in pan.
10. Cut and serve with a scoop of ice-cream or a generous amount of warm custard.


And here is the recipe for my version of an apple and rhubarb cake. I hope that you guys enjoy it, enjoy the weather and the fresh foods that are available at this time of the year, it is usually one of the best. 

I'll try and post more recipes up, until I have my final exams at least....so until the next post have fun, enjoy the sun but remember to stay healthy, safe and happy! 

Friday, February 15, 2013

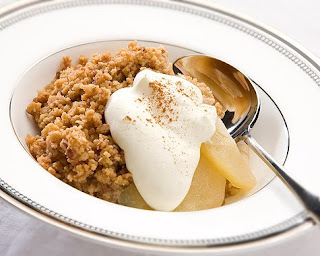
Apple Crumble

I'm back with another recipe today......I'm nearing the end of this blogging week. It's been fun but coming up with recipe has been a bit hard when I have been busy.

I really should do this more often though, it pushes me to create new content for the blog. Also in other news I am nearing 100 blog posts, I really should do something AMAZING for my 100th blog post.....I'll try and have it figured out my then. Hopefully.

So, today's blog post I think I'll do something that is sweet, after all I'm in a sweet mood these days. I feel like something that is a classic and heart warming.

Apple Crumble. That is what today's recipe is going to be. I know that I have been doing a lot of western recipes this week, but I promise that for tomorrow I am going to blog a Korean recipe.

The humble apple crumble, something that we all saw on our dinner tables a couple times a year.There isn't much to be said about this recipe other than that it will always be loved for it's soft apples and crunchy topping. I hope that you will like this recipe of it, and let's get started!!

Ingredients
4 green apples
1 lemon, juiced
4 tbsp caster sugar
90g plain flour
40g cold butter
65g caster sugar
1 tbsp brown sugar
handful of desiccated coconut

Method
1. Preheat an oven to 190˚C. peel and chop the apples.
2. Place into a microwavable bowl and mix with the lemon juice and 4 tbsp sugar.
3. Microwave for 4 minutes on a high setting to soften the apples.
4. Pour into an oven proof baking dish.
5. Rub the butter and flour in a clean bowl and rub together with your fingertips until the mixture resembles breadcrumbs.
6. Add the caster sugar, brown sugar and desiccated coconut, then stir together.
7. Sprinkle over the fruit.
8. Bake for 25 minutes until golden brown and the fruit is bubbling.
Serve hot with cream or ice cream.


And there you have it, a scrumptious apple crumble that is to die for any time of the year.

I hope that you enjoyed that recipe because I know what I'm going to be having for dessert tonight. Until tomorrow remember to stay happy, healthy and safe.


Tuesday, February 12, 2013

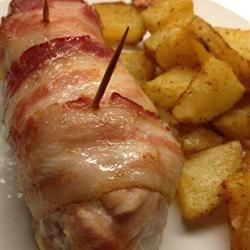
Valentines Day Pesto Kiev with Potato Mash

Sooooo, 2 days out from Valentines Day for everyone and today I'll be posting up the 3rd recipe for the week. The main course for your three course Valentines Day meal :)

I had a bit of a dilemma thinking about what to post as I wasn't sure whether or not I wanted something simple and classic such as pasta or something more adventurous......

I think I'll settle for something that is a classic and foolproof but with a slight twist so that your Valentine will always remember your amazing meal. So everyone knows that stuffed chicken breast is a classic favourite, today I'm not going to go with the classic kiev style stuffing, I'm going to be putting a twist on it.

So I guess I'll just get started with the recipe;

Ingredients
2 chicken breasts
2 rashers of bacon
150g grated cheese
6 tbs pesto
30g butter
2 tbs chopped chives
2 tbs minced garlic
salt and pepper
Mash
750g potatoes
125ml hot milk
Salt and pepper

Method
1. First off make an incision in the side of the chicken breast, along the length of it to create a pocket.
2. Next make your kiev stuffing, combine the butter, chives, garlic and season with salt and pepper.
3. Distribute even quantities of the kiev stuffing into the chicken.
4. Then add 2 tbs of pesto into each chicken breast.
5. Stuff all the stuffing in before adding a handful of cheese to fill out the pocket.
6. Rub the remaining pesto onto of the chicken breast to marinate it.
7. Wrap the rasher of bacon around the chicken to seal the opening of the stuffing and secure with a toothpick.
8. Sprinkle more cheese on top of the bacon.
9. Place the chicken into the oven at 200C for 30 minutes, or until it comes out cooked and slightly golden.
10. Make the mash, whilst the chicken cooks. To make mashed potato, place unpeeled potatoes in a medium saucepan and cover with cold water. Bring to the boil over high heat. Reduce heat to medium-high and gently boil, uncovered, for 30 minutes or until soft.
11. Drain potatoes. Set aside for 5 minutes to cool slightly. Peel and return to pan. Use a potato masher to mash until smooth. Add half the hot milk and use a wooden spoon to beat until combined. Beat in remaining milk and season with salt and pepper.
12. The chicken will has rested and the mash will be steaming hot and you are ready to serve with a side of salad or pasta.

And there you have it, a unique main course for your Valentines Day meal that puts a twist on a classic favourite with new flavours.


I hope that you guys will like that recipe :)

And I really do want to start filming some of these recipes so I will be trying my best to get at least one recipe up soon, and I really do want to film this one. So possibly some time this weekend you will see this recipe being made into a video,  bit too late for Valentines Day this year, but not too late for next year. 

Don't forget that tomorrow my recipe for Valentines Day dessert will be coming out, so stay tuned for that and I will see you guys tomorrow. 

Saturday, November 17, 2012

Soft Chocolate Pudding

Yea...so it has been more than a day. But better late than never?

I'm not going to be posting a Korean dish today. I felt like doing a good old chocolate dessert that we will all love. I'm going to be sharing with you today my version of a soft chocolate pudding. The centre and runny and chocolate-y whilst the 'crust' around it is soft and delicate.

There is not much that I can say about it without showing blogging to you. So let's get started;

Ingredients
1/2 cup  butter, plus some for buttering the molds
150g 85% dark chocolate or you can go for less intense such as 70% (try and use good quality chocolate)
1 tablespoon cocoa powder
2 eggs
2 eggs yolks
1/4 cup sugar
1/4 cup flour, plus more for dusting

Method 
1. Melt the chocolate and butter in a bowl over a pot of simmering water. But ensure that the base of the bowl does not sit in the water. Stir it as it melts to get a smooth and shiny mixture.
2. Beat the sugar, egg and egg yolks until it is light yet thick.
3. Beat the chocolate and egg mixtures together whilst the chocolate is still hot and runny.
4. Quickly FOLD in the flour and cocoa powder until just combined.
5. Butter and then lightly flour 4 ramekins.
6. Divide the batter evenly between the ramekins.
7. Preheat the oven to 240 degrees Celsius and bake the ramekins in a hot water bath for about 6-8 minutes. The centre should still be soft, but if it is too soft for your liking then bake it for 10 minutes.
8. Invert the ramekins onto serving plates and let it sit for 10 seconds. (or leave in ramekins)
9. Serve hot with whipped cream or ice cream.

And there you have it a delectable dessert that you can serve up as the nights are getting colder or as the days are getting warmer. It is the perfect dessert to serve all year around.


I hope that you guys will enjoy this chocolate-y recipe that will be sure to fatten you up before Thanksgiving and right before Christmas. It is a good dessert to prepare you for for the festive season. 

This will be it from me today, I hope that chocolate is up your avenue, if it is not I'll be sure to post a similar dessert minus all the chocolate soon. I hope that you will all stay safe, healthy and most of all happy until my next post.